Uncategorized
how to screenshot on windows 10 or 11 for PC or Laptop
Easy way to screen shot on any windows os
how to screenshot on windows 10 or 11 for PC or Laptop , screenshot on windows 10 / 11 or any windows OS , its a asy process to take screen short , process below
screenshot on windows Process 1
- step 1 : Press ” PrtSc ” key in keyboard
- step 2 : open word or paint and press “ctrl” + “v” (ctrl+v) key in keyboard
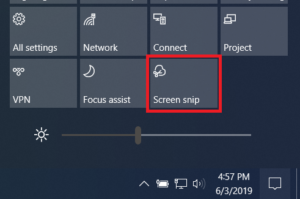
screenshot on windows Process 2
click notification ber in task bar manu… then click screen snip option, then select area that you take screen short

screenshot on windows Process 3
use screen recorder app or screen short app for windows and take screenshort
screenshot on windows Process 4
Hold “windows” key and press ” shift ” and also press ” s ” ..now it can your clipboard, then press “Ctrl” and press “V” key in pain or M.S word file or photoshop for view
It’s astounding the way that long it has taken to consummate this straightforward capacity. Windows has had screen-printing abilities since the primary PCs during the 1980s (their text-based choice varied from the present raster screen captures). Windows 10 acquainted new ways with take screen captures, such as utilizing Snip and Sketch, and taking screen captures in Windows 11 settles the score more brilliant with the Snipping Tool. For every one of the intricate details of the methodology on Microsoft’s most recent OS, read How to Take Screenshots in Windows 11.As a product analyst at PCMag, snapping screen captures is something I want to do commonly every day. There could be no more excellent approach to showing perusers how a program really examines activity. I for the most part audit Windows programming, so I know about the different ways of catching screens on that working framework. Essentially every PC client once in a while needs to take a screen capture, if by some stroke of good luck to share what they’re seeing on the screen with an associate or outer business.
However, here we’re worried about screen captures in Windows 10. Underneath, I walk you through the multiple ways of catching the Windows 10 PC screen so you can settle on an educated choice on which strategy turns out best for you.
| how to screenshot on windows For Windows 10 | Select the Start, enter snipping tool, then select Snipping Tool from the results. |
| Press Windows logo key + Shift + S. | |
| how to screenshot on windows For Windows 8.1 or Windows RT 8.1 | Swipe in from the right edge of the screen, select Search, enter snipping tool in the search box, and then select Snipping Tool from the list of results. |
| how to screenshot on windows For Windows 7 | Select Start, then enter snipping tool in the search box, and then select Snipping Tool from the list of results. |
On Windows, squeezing PrtScr catches a screen capture of the whole work area, while Alt+PrtScr catches just the dynamic window. Caught screen captures do exclude the mouse pointer. Windows puts these caught screen captures in the clipboard, implying that an extra program needs to recover them from the clipboard. Beginning with Windows 8, notwithstanding, ⊞ Win+PrtScr or ⊞ Win+Volume up immediately saves a screen capture to the “Screen captures” envelope in “Pictures” library. All screen captures are saved as PNG records. Note: On certain scratch pad you need to hold Fn and afterward press PrtScr instead.
Windows Vista and later incorporate a utility called Snipping Tool, first presented in Quite a while XP Tablet PC Edition. It is a screen-catch instrument that permits taking screen captures (“cuts”) of a window, rectangular region, or freestyle region. Beginning with Windows 10, Snipping Tool acquired time postpone usefulness, valuable for catching setting menus. Clips can then be explained, saved as a picture document or as a HTML page, or messaged. Nonetheless, it doesn’t work with non-tablet XP forms however addresses a XP viable same. Windows 7 and later likewise incorporate Problem Step Recorder as a feature of their investigating stages that once begun, consequently catches a screen capture at mouse clicks.
There are exemptions for what can be caught by this technique. For instance, contents in equipment overlay are not caught. This incorporates video pictures that Windows Media Player 10 or prior play. Thusly, exceptional programming might be expected to catch the screens of video games.
After numerous long stretches of utilizing Snagit (see underneath), this has turned into my essential screen capture strategy. Hit the Shift-Windows Key-S console combo, and you have a decision of shooting the full screen, a rectangular choice, a freehand determination, or a singular program window. An elective method for conjuring Snip and Sketch is through the Action Center’s Screen clip button.
In the wake of hitting this console easy route, you immediately see a little thumbnail board warning at lower right that says Snip Saved to Clipboard. Tap this to open the Snip and Sketch window. In this, you can increase the picture with a pen, pencil, highlighter, eraser, ruler, and trimming instrument. Then, at that point, you can save your preferred picture to an envelope, or offer it utilizing the standard Windows Share menu. That allows you to send the picture to Instagram, Messenger, Mail, or some other application that acknowledges the record type. It likewise allows you to send it to a close by PC with Nearby Sharing empowered.
Two or three things I wish Snip and Sketch had are text overlay and essential shapes, including the always valuable bolt. If you just have any desire to utilize this apparatus, you can go into Windows’ Settings application and pick Ease of Access > Keyboard and pick Use the PrtSc Button to Open Screen Snipping. Note that this requires restarting Windows.
This is the long-lasting exemplary technique for screenshotting in Windows 10. It’s particularly helpful for shooting applications that change appearance when you hit a console blend. Frequently a menu will fall when you tap a shift key. Hitting the Print Screen or PrtSc key duplicates the whole screen to the Clipboard; adding Alt along with Print Screen duplicates the dynamic window square shape as it were.
You truly do have to find additional ways to open and save your picture in an application that arrangements with pictures, like Paint, Paint 3D, or even Photoshop (except if you exploit the following tip). Just glue with Ctrl-V when you’re in another report in one of those applications, and afterward you can get down to business with altering, lastly, save your preferred picture to the organizer.
This is perhaps the best thing ever to hit screen captures in Windows, having shown up in 2015. Similarly as with the regular Print Screen key, you can save the whole screen or the dynamic window with Print Screen or Alt-Print Screen, separately. Yet, after you go to OneDrive’s Settings board and pick Automatically Save Screenshots/Capture to OneDrive from the Backup tab, you’re saved from being required to open an imaging application, gluing from the clipboard, and afterward saving the record. Hit Print Screen, and you have a picture record saved, across the board venture.
Windows’ Action Center (the slide-out board on the right half of the screen) tells you that your shot was saved, and you can tap on the notice to take you right to the organizer where it’s saved. Assuming you utilize this technique a great deal, you’ll likely need more distributed storage than simply the free 5GB. An Office 365 record (beginning at $6.99 each month) gets you 1TB, as well as all the renowned efficiency applications.
This technique was presented with Windows 8 however it actually works in Windows 10. It’s easier than a large portion of different techniques in this story, and on tablets like the Surface Pro, you conjure this usefulness by squeezing Volume Down and Power button simultaneously. This or Windows Key-Print Screen key combo will immediately obscure the screen to show you it worked, and quickly save a PNG picture record to your Pictures > Screenshots envelope.
Alt-Windows Key-Print Screen saves simply the dynamic window, in any case, curiously, this uses the Windows Game Bar (see next slide) usefulness, saving your screen capture to your Videos/Captures organizer. Both of these strategies are great assuming you need moment saving without wasting time with the Clipboard or OneDrive distributed storage.
Cutting Tool stays in Windows 10, however it’s been supplanted by Snip and Sketch. Assuming that you’re sticking to Windows 7, you will not have the choice to utilize Snip and Sketch (definite above), so Snipping Tool is for you. To utilize this, you’ll have to really run the utility; composing “clipping” in the Windows search box at lower left and tapping Snipping Tool kicks you off.
Like Snip and Sketch, Snipping Tool allows you to catch free-from or rectangular determinations or the full window or full screen. You can time-delay a screen capture, also, from one to five seconds. It additionally allows you to increase your picture with a pen or highlighter. Clip and Sketch (as verified above) does generally that and adds editing, a ruler, and a pencil.
One more method for taking screen captures is by utilizing an outsider instrument. Our most loved screen capture application at PCMag is Snagit. Snagit has something like one significant advantage over Windows’ inherent screen capture devices: You can snap away and every one of your shots stay in the utility’s store, accessible whenever you could require them later. It’s the most un-problematic method for shooting screens while proceeding with your work. After you’re prepared to manage the shots, you can peruse the set of experiences and save the pictures you need to your preferred envelope.
Snagit additionally incorporates progressed instruments like video and looking over window screen capture apparatuses. It offers convenient picture altering and drawing devices, including splendor, bolts, text overlay, and lines. The drawback? A Snagit permit will slow down you , however for the people who need its high level usefulness, it merits the cash.